What is HTML Image Tag in Hindi
कोई भी तस्वीर या image को HTML document में दिखाने के लिए image tag का इस्तेमाल होता है |
इस tag को img के जरिये लिखी जाती है |
ये एक empty tag है, मतलब इसका कोई closing tag नहीं होता यानी</img> tag लिख कर इस tag को बंद करने की जरुरत नहीं होती है | img tag एक self-closing tag है |
Syntax:
<img src=”url” alt=”some_text” />
उदाहरण:
<img src=”image1.png” alt=”my image”/>
<img> tag के attributes
src और alt , ये दो attributes जरुरी होतें image tag के लिए |
- src attribute: ये image का path को दर्शाता है | मतलब कहां पे है उस पुरे url को src attribute में लिखा जाता है | src attribute है इसके बिना image display नहीं होगा |
- alt attribute: इसका इस्तेमाल image को एक नाम देने के लिए होता है |
- Height and Width attribute: Web page में image को सही से दिखाने के लिए उसकी लम्बाई और चौडाई को सेट करना पड़ता है | उसके लिए width और height attribute का इस्तेमाल किया जाता है |
src attribute (image source atrribute)
src attribute से आप image का सही पाथ बताते हो की image कहाँ पे है | जब आप किसी project पे काम करेंगे तो आप files अलग अलग फोल्डर में रखोगे | मतलब css files के लिए अलग फोल्डर, webpages के लिए अलग फोल्डर और images के लिए अलग फोल्डर होगा | ऐसे project पे काम करने में और सही file को ढूंडने में आसानी होती है |
image अलग फोल्डर में होने के कारण src में image का पाथ सही से देना होगा मतलब पूरा पाथ की वो कोनसे फोल्डर में है |
उदाहरण:
<img src=”images/image1.png” alt=”image1″ width=”40%” height=”20%”/>
इस उदाहरण में image1.png, “images” फोल्डर में थी | इसीलिए इसका पाथ src attribute में लिखा गया |
कभी कभी दुसरे website का image को हम अपने वेबपेज में लगातें हैं | उसके लिए पूरी image का सही पाथ src attribute में लिखना जरुरी है |
हम local system में रखी गयी image या फिर किसी global location से image लाकर webpage लगा सकते हैं | इसीके लिए image path सही से देना जरुरी होता है | इसी कारण img tag के साथ src attribute लिखना जरुरी है |
alt attribute
internet स्लो होने के कारण या image की पाथ सही ना होने के कारण वेबसाइट पे image कभी कभी दिखाई नहीं देती है | तो उस जगह कोई text दिखाई देने के लिए alt attribute का इस्तेमाल होता है |
इसीलिए alt attribute से image की जगह कोई text दिखाई जाती है | जिससे यूजर को पता चलता की उस जगह पे कोई इमेज है जिसका नाम दिखाई दे रहा है |
उदाहरण:

alt attribute के जरिये html page में image न दिखने वाली खाली जगह भी हट जाती है और सिर्फ उतना ही जगह दिखती है जितने में alt attribute value show हो सके |
Height and Width attribute
height और width से आप image को सही लम्बाई और चौडाई में सजा सकतें हैं | height और width की default value, pixel में सेट होती है | आप % (percentage) में भी width और height दे सकते हैं |
उदाहरण:
<html>
   <head>
      <title>html image tag example</title>
   </head>
   <body>
      <h1>Image Example</h1>
      <img src="image1.png" alt="image1" width="200" height="100"/>
   </body>
</html>
output

अगर आप width और height में सिर्फ नंबर लिखते हैं, तो html उसे pixel की तरह लेगा |
मतलब width=”200″ height=”100″ को width=”200px” height=”100px” की तरह भी लिख सकते हैं | दोनों image tag के लिए एक जैसे ही परिणाम देंगे |
पर अगर आप image की width और height को % में देना चाहते हैं तो फिर “%” लगाना जरुरी है |
उदाहरण:
<img src=”image1.png” alt=”image1″ width=”40%” height=”20%”/>
image alignment
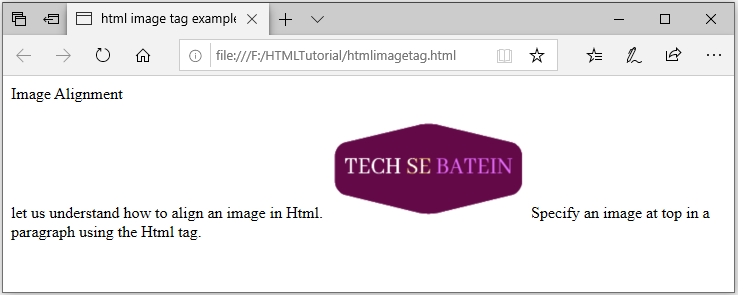
webpage में image by-default left side में align होता है | image को दुसरे side में दिखाने के लिए align property का उपयोग किया जाता है |
Syntax: <img align=”top/left/bottom/middle/right” src=”img1.png” />
उदाहरण
<html>
 <head>
  <title>html image tag example</title>
   </head>
   <body>
    Image Alignment
    <p>let us understand how to align an image in Html.
    <img align="top" src="F:/HTMLTutorial/images/image1.png" width="200" height="100" >
       Specify an image at top in a paragraph using the Html tag.</p>
   </body>
</html>
output

<image> को hyperlink कैसे बनाएं?
Hyperlink बनाने के लिए anchor tag का इस्तेमाल होता है | Hyperlink से आप एक वेबपेज में दुसरे वेबपेज में जा सकतें हैं | <image> के आगे anchor tag को लगा कर image tag को hyperlink बनायी जा सकती है |
उदाहरण:
<html>
   <head>
      <title>html image tag example</title>
   </head>
   <body>
      <h1>Image Example</h1>
      <a href="webpage2.html"><img src="images/image1.png" alt="image1" /></a>
   </body>
</html>
ismap attribute
ismap image tag का एक boolean attribute है | जब किसी image को server-side image map का part बनाना होता है तब इस attribute का उपयोग होता है |
नॉटपॉइंट: image map जिसमें image की हर area clickable होता है और click हुई जगह की coordinates को URL query string के जरिये server को भेजी जाती है |
ismap attribute set होने से image के किसी हिस्से पे जब click होता है, तब उस जगह की coordinates को server map को भेजी जाती है |
ismap का उपयोग anchor tag के साथ होता है |
Syntax: <img ismap>
उदाहरण
<!DOCTYPE html>
<html>
<body>
<h1>Image tag with ismap attribute</h1>
 <a href="/activity.php">
  <img src="images/image1.png" alt="image1" width="200" height="100" ismap>
 </a>
 <p>Click the image, and the click coordinates will be sent to the server as a URL query string.</p>
</body>
</html>
absolute path और relative path क्या होता है?
src में image path दो तरह से दी जा सकती है और वो है absolute path और relative path |
अगर html page और image दोनों एक ही drive में है तब पूरा path लिखने के वजाये relative path दी जा सकती है |
उदाहरण:
<img src="image1.png" alt="carimage" />

<img src="images\car2.jpg" />
अगर image किसी और location से उठा रहे हैं या फिर internet के किसी website से लेकर आपके website में लगा रहे हैं, तब image के path को पूरा बताना पड़ता है यानि root location को पूरा mention करना पड़ता है | और उस पुरे path को absolute path कहा जाता है |
उदाहरण:
<img src="F:\htmlCSS\images\car2.jpg" alt="car image" />

<img src="https://cdni.autocarindia.com/utils/imageresizer.ashx?n=https://cms.haymarketindia.net/model/uploads/modelimages/Mahindra-Scorpio-N-300620221053.jpg&w=872&h=578&q=75&c=1" alt="car image" />
उदाहरण में देखिए हमने दो images लिए हैं | पहली image local system में थी इसीलिए उस directory का पूरा path बताएं हैं | और दूसरा image internet के site से ली गयी है इसीलिए उसकी पूरी path बताई गयी है |
इसीलिए absolute path में पूरा location बताया जाता है | और relative path में image उस html page से कोनसे जगह पे है वो बताया जाता है |
image और html file एक ही drive में हो तभी ralative path दी जाती है | अगर दोनों की drive अलग अलग हो तो absolute path का उपयोग करें |
